For beginners who use Windows 10 Pro or Home Single Language version might be awesome and exciting with full of innovative features. However, there is most annoying, disgusting and unavoidable feature of Windows 10 which is Windows Update. Many people lost their data after forced updates kicked in and eventually it led to court cases in US and elsewhere. To stay on safe side, today I dedicate myself fully with essential contribution to windows users’ community. After loads of trying and reading on various forums I finally initiated tutorial with easy steps to turn off Windows 10 update feature for good. So, we begin our tutorial with detailed screenshots.
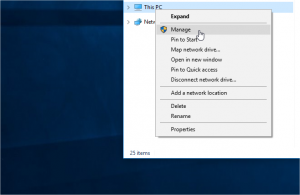
Step 1: Click on File Explorer near to windows button

Step 2: Once you see This PC icon on the left side, right click mouse and press Manage option
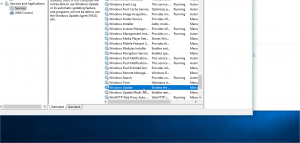
Step 3: Wait for pop-up window, once you will see Computer Management window and you have to double click on Services and Application then double click on Services

Step 4: Here you going to see complicated options but don’t worry, only thing you have do is scrolling all the way down and find Windows Update and double click
Step 5: Change Startup type into Disabled and click on Stop button in order to make Service status stopped
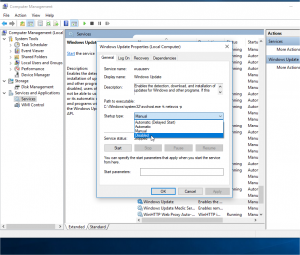
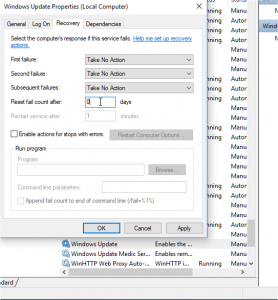
Step 6: Then go to Recovery and change First Failure option into Take No Action then change 1 into 0 (zero) finally Click on Apply then OK
Step 7: Click on Windows search button and type Edit Group Policy and click on it (This step only works for Windows 10 Pro version if you have Home Version you are required to skip Step 7, 8, 9, 10, 11, 12 and 13. Windows 10 Home users may skip to step 14)

Step 8: Once you see Local Group Policy Editor Window, click on Administrative templates to populate options and click on Windows Components to populate drop down options

Step 9: Again long drop down menu will appear and you only have to scroll down until you can find Windows Update option and click once
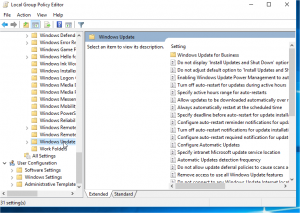
Step 10: And double click on Configure Automatic updates
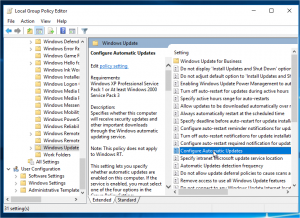
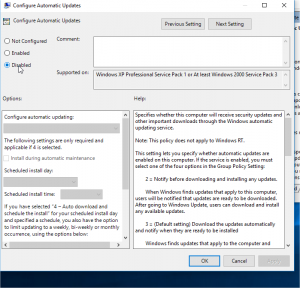
Step 11: Choose option Disabled and Apply then OK
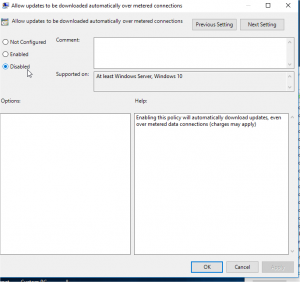
Step 12: Stay on Local Group Policy Editor and you can find option Allow Updates to be Downloaded Automatically over metered connections please double click

Step 13: Select Disabled option Apply and OK and close the Policy Editor
Step 14: On Windows Search type Task Scheduler and click on it

Step 15: On Task Scheduler window you have to click to populate on task scheduler library then Microsoft and after that Windows
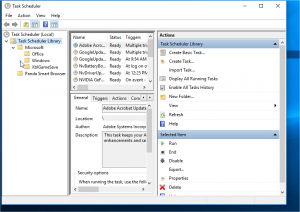
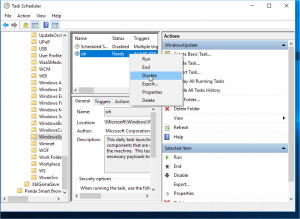
Step 16: Scroll again all the way down to Windows Update and click it

Step 17: When you see Enabled status on Sih and Scheduled you have to change into Disabled whatever name service would be there
Step 18: Go to Settings

Step 19: Choose Network and Internet

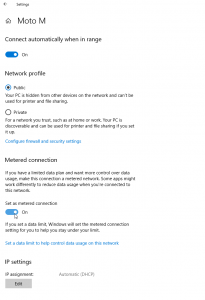
Step 20: Select Wi-Fi and click on current connection (Example school Wi-Fi or home Wi-Fi)
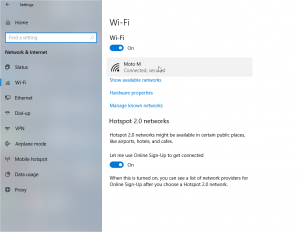
Step 21: ON the Metered Connection